Wednesday, December 28, 2011

Home made Hamburger Buns and Sloppy Joes

I made hamburger buns, which is a lot like making any other bread from scratch.

Activated yeast, check.

Let the dough rise, check.

Cut hamburger bun shapes, check.

The final buns.

They're definitely not the big, poofy, thick, sesame seed laden buns from the grocery store, but they are also free of unnecessary ingredients and additives, so it works for me!

For the sloppy joe mixture:


1 pound ground beef
1 can tomato sauce
1 tsp garlic
1 tsp onion powder
1 tsp salt
1/4 tsp pepper

In a deep skillet, cook beef until it is browned.  Add remaining ingredients and simmer for 20 minutes.  Load onto buns.


Home made English Muffins and a Tomato-Spinach Sauce

I saw this picture of a tomato-spinach sauce over what looked like an English muffin, and it looked absolutely divine beyond explanation, but there was no accompanying recipe.  So I shot from the hip.

I googled English muffin recipes and landed on this one since the ingredients were mostly okay, unlike the others I saw which called for powdered milk (yuck).  I subbed butter for shortening & honey for sugar.  I was really happy with how they turned out.


For the sauce, I completely winged it and didn't write anything down, which I will live to regret.  I started by heating olive oil and garlic in a pan until it was fragrant, then I added spinach (already cooked) and mushrooms and let them cook until the mushrooms were a little brown.  I lightly pureed a few tomatoes (so they were still chunky) and added them with a little milk.  I brought it to a light boil, then reduced to a simmer and let it simmer for awhile.  I can't remember if I added anything else, but I don't think I did.

Once the sauce had thickened a little bit, I removed the heat and scooped the mixture onto the English muffins, then topped with grated raw mozzarella cheese.


This was so ridiculously delicious.

Butternut Squash Ginger Carrot Soup

I found a recipe for a carrot ginger soup, which sounded phenomenal to me, but I also had this big butternut squash lurking around my kitchen, begging to be used before it went bad.  I decided to try incorporating it into this soup by halving the amount of carrots and replacing it with butternut squash.  Since butternut squash doesn't have a very distinct flavor on it's own, you definitely just taste the carrot.  Or in my case, because I doubled the amount of ginger, you just taste ginger.  A mouthful of exploding ginger.

Chop, chop, chop.

Two cups carrots, two cups butternut squash.

Home made vegetable stock.

The recipe calls for vegetable stock, which I had previously never made before because I had no idea how remarkably easy it is.  You can follow these directions here, but basically: buy a bunch of random vegetables (I used celery, carrots, spinach, broccoli, onions and mushrooms) and simmer them in a pot of water for an hour.  Salvage the broth.  YOU'RE DONE.  There's really no need to buy veggie stock from the store.

The recipe also called for fresh ginger, fresh squeezed orange juice, and rolled oats.


If you're wondering if a tablespoon of ginger is enough: IT IS.  I used two tablespoons and my mouth was on fire with ginger.


Once all the ingredients had simmered on the stove for awhile, I poured it all into a food processor.


And the result is a creamy, smooth carrot-ginger soup!


I do like the soup, but I really did use too much ginger, so it was kind of overwhelming for my taste buds. :)

Wednesday, December 21, 2011

Healthy Food on a Budget

Whenever I talk about organic food, the price of it inevitably ends up in the conversation.  Most people I know compromise by getting the most important things organic (like the dirty dozen and milk, for example), and the less important things conventional.  I do a lot of that myself -- buy it organic unless the organic version is so alarmingly expensive that it makes me want to cry.

Today, I did a pretty big grocery trip & decided to pay careful attention to what I'm getting and how much I'm spending. We are a family of five and I spend roughly $500-$600 a month on groceries.  I'm told this is a modest monthly food budget, but I don't know, I feel like it's a lot!

I went to Costco first and purchased:
  • 10 pounds of sweet potatoes
  • 8 organic apples
  • 6 pounds of pears
  • 4 jars of organic applesauce (11 lbs, 13 oz)
  • 2 whole organic free-range chickens
  • 1 lb. organic spinach
  • 2.5 lbs. organic celery
  • 5 lbs. clementines
  • 3 lbs. bananas
  • 5 large hass avocados
  • 18 oz. blackberries
  • 32 oz. strawberries
  • 2 lbs. brussel sprouts
  • 24 oz. baby bella mushrooms
  • 40 oz. organic tortilla chips
  • 32 oz. pure maple syrup
  • 2 loaves of organic sprouted whole wheat bread
  • 24 large organic eggs
  • 2 pounds organic butter

Total: $121.20


From there, I went to Sprout's Farmer's Market and bought:
  • 1 eggplant
  • 4 lemons
  • 5 limes
  • 6 oranges
  • 1 lb. organic carrots
  • 5 lbs organic potatoes
  • organic whole milk yogurt, plain
  • organic whole milk yogurt, vanilla
  • organic coconut milk creamer
  • half gallon organic whole milk
  • 1 block organic cheese
  • 2 packages mini babybel cheese
  • 1 package string cheese
  • 1 can black olives
  • 2 six packs of natural soda (for husband, ha)
  • 2 pounds organic grass-fed ground beef
  • 1 thirteen lb. whole organic free-range turkey
Total: $87.31

Grand total: 208.51

I have no idea how this compares to others, but I would be curious to know!

Friday, December 9, 2011

Coconut Milk Coffee

It's been awhile since I've updated.  I'm still cooking - just not blogging!

I'm part of a local natural food group that holds monthly meetings.  They met today with the topic of Coconuts.

I know I've already talked about coconuts and already talked about how to make your own coconut milk, but I learned today that you can make this milk with the dried coconut flakes.  I usually make it with fresh coconuts and somehow it never occurred to me to use coconut flakes!


Making homemade coconut milk from coconut flakes:
• 2 cups organic dried and unsweetened coconut flakes
• 4 ½ cups water
First, soak the coconut in the water, covered for 20 minutes.
Transfer the coconut and water to a high speed blender or food processor and process until smooth and creamy (a few minutes, usually).

 Pour the mixture through a fine-mesh strainer (or use a cheese-cloth to strain) over a bowl or jar. Press on the coconut pulp with a wooden spoon to remove all the milk. 

Cover and refrigerate for up to 3 days.


From here, I heated 1 cup of coconut milk in a saucepan and whisked it to make it frothy.  Then I added it to 1 cup of coffee with a tablespoon of cocoa & a tablespoon of honey.  It's perfect!  I think I have finally found a homemade, naturally sweetened alternative to flavored coffee creamer - with all the added benefits of coconut! :)

Sunday, October 16, 2011

Broccoli and Cheddar Quiche with a Brown Rice Crust


Dinner #2 this week is a broccoli and cheddar quiche with a brown rice crust.  I only put broccoli on half because my husband isn't a fan of broccoli (or any vegetable, for that matter).  This was my first time making a quiche, and my husband's first time ever eating quiche.  The brown rice crust was decent, it was simple and I greatly appreciated that.  I enjoyed this quiche the next morning for breakfast more than I did eating it for dinner.


Both my husband and I agree it would have been better with bacon. Duh, everything's better with bacon.

Saturday, October 15, 2011

Chicken Soup & Jalapeno Cheddar Cornbread

I'm focusing on dinners this week.  By that I mean, I'm trying really hard to actually plan and cook meals, rather than throwing something together every night.

Last night was home made chicken soup and jalapeno cheddar cornbread.

The chicken soup is a little bit of a process, but the results are delicious.  I stick a whole organic chicken + water in a crock pot until the meat is falling off the bones, about 12 hours.  I salvage the broth in a jar, seperate all the meat from the bones, then stick the bones back in the crock pot and cover with water.  I let the bones simmer for about 6 hours, which results in some seriously flavorful and nutritious bone broth.  I then remove the bones and discard, combine the two broths, and then let the chicken & chopped vegetables simmer in it for awhile (since my husband doesn't like vegetables, I kindly left them out this time).  For myself, I scooped out some chicken and broth as is, but for my husband and kids, I added pasta and let simmer until cooked (about 5-8 minutes).  It's a bit of a long process, but the amount of work I actually do is minimal.


I shared the soup with a friend unaware that chicken soup is his favorite food.  When I told him that it was nothing but water, chicken and salt, he was really surprised by how much flavor there was for such simplicity.  He said, "Trust me, it's really good."

The recipe for the cornbread can be found right here.  I ommited the scallions (for husband's sake) and used unbleached white flour.  I thought it was pretty tasty - it was moist, rich, fluffy, and kind of reminded me of the texture of eating cake, but without the sweetness.  My husband wasn't too fond of it. :(


Monday, October 10, 2011

How to have a delicious & sweet pumpkin breakfast:

Although I've made plenty of healthy changes to my family's diet and we are making wonderful progress towards better food choices, I still have a huge weakness: Sugar!  Just because I'm baking with whole, unrefined, natural sugars doesn't magically make sugar good for our bodies.  I'm not sure if Halloween/Thanksgiving/Christmas is really a good time to start depriving ourselves of our favorite foods, so maybe after the Holidays?  Yeah?  In the meantime, I am still letting us indulge in some delicious, seasonal favorites. :)

Here's how to have a delicious and perfectly sweet pumpkin breakfast:


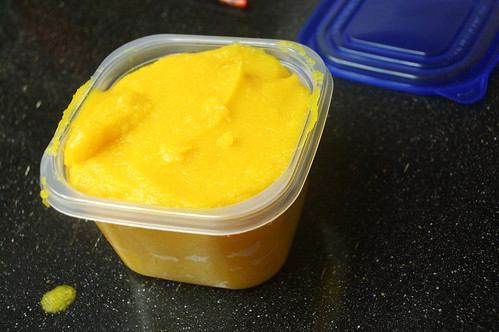
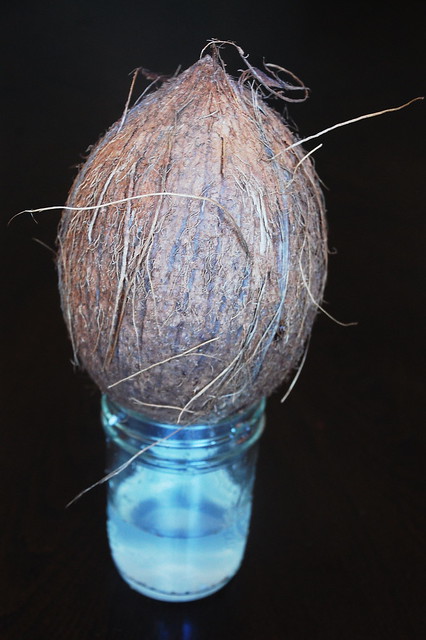
1) First, buy yourself a baking pumpkin.  Cut it right down the middle and remove all the pulpy strands and seeds (if you like, you can save the seeds and bake them for a crunchy snack). Place the pumpkin halves face down in a baking dish and add 1/2 an inch of water to the pan to keep the pumpkin moist.  Bake at 450º for about 45 minutes, or until you can pierce the skin with a fork.  Seperate the pumpkin flesh from the skin by scooping it out.  Use a blender or food processor to whip into a perfect, creamy pumpkin puree.


Now you have fresh pumpkin on hand for baking!
You can store it in the refrigerator, or freeze in ziplock bags.


2) Next, bake yourself a couple easy french bread loaves.
Don't worry, it really is easy!  The best advice I can think to give you if you're not accustomed to baking your own bread is this: be patient and use fresh yeast.  Your dough has to rise, so don't rush it or try to cut corners.  And if your yeast is old, your bread will be a disaster (speaking from lots of personal experience here). 

Dissolve 2 packages of active dry yeast in 1/2 cup of warm water with 1/2 tsp of honey.  Dissolve completely and let sit for 5-10 minutes.  Once active, combine together with 2 tablespoons honey, 2 tablespoons of olive oil, 2 teaspoons of salt, and 2 cups of hot water.  Now stir in 7-8 cups of flour (whole wheat, unbleached white, or a combination of both - it's up to you).  Less is more on quantity!  I've never needed the whole 8 cups.

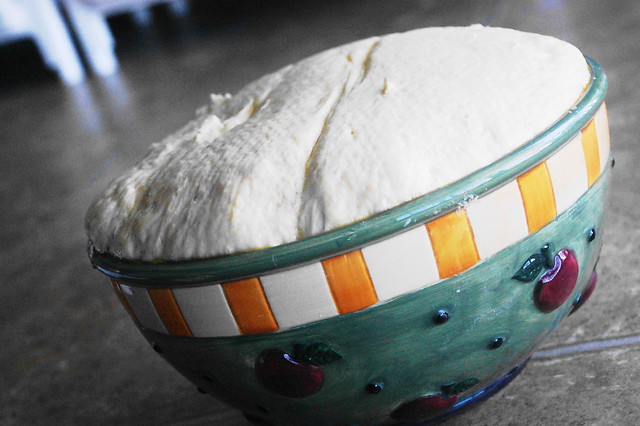
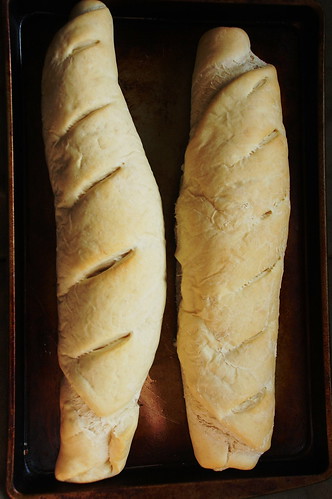
Knead your dough for 10 minutes, or until smooth and elastic.  Grease a bowl with olive oil, turn the dough over in the bowl once, and let rise until it's doubled.  Punch it down, and let rest for 15 minutes.  Now divide the dough in half and, on a floured surface, roll each half out into a 12x15" rectangle.  Roll up, starting from the 15" edge.  Place loaves on a greased cookie sheet and make 4-5 slashes diagonally across the tips.  Let rise again until double.

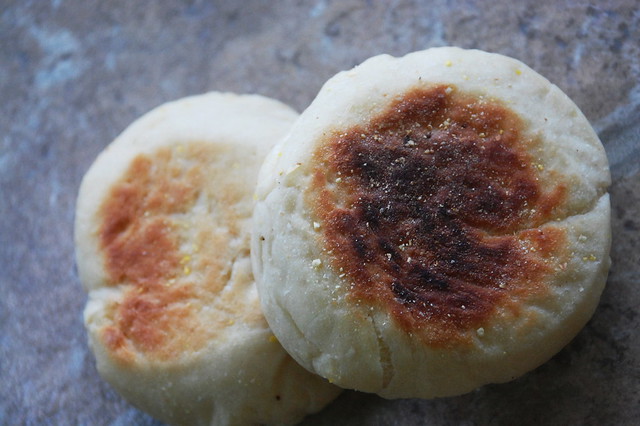
Brush on 1 beaten egg or melted butter, then bake at 400 degrees for 20 minutes.

This bread makes wonderful toast in the morning for breakfast, a great side for dipping in home made soup, and it also makes moist, soft, delicious PBJ sandwiches. :)

3) Now you're ready to make that pumpkin breakfast!

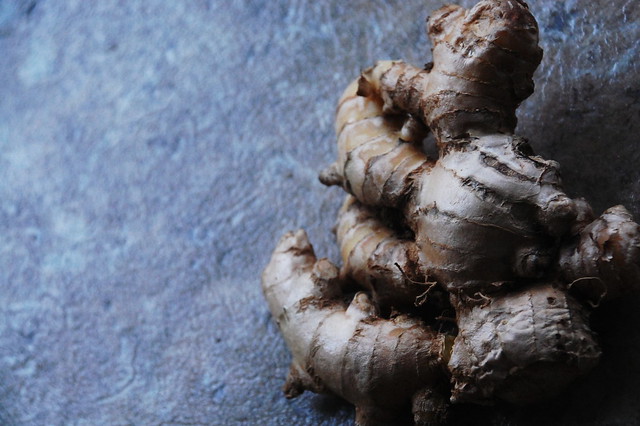
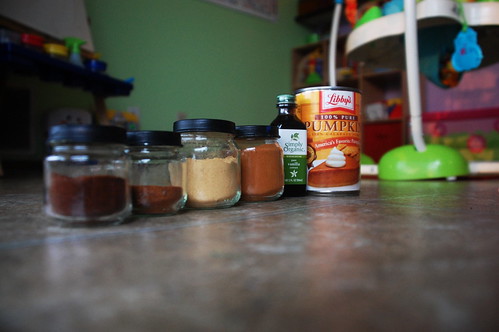
In a saucepan, combine 1½ cups water and 1½ cups sugar of your choice (rapadura is what I recommend) over a medium heat. Stir occasionally until the sugar has completely dissolved.  Whisk in 4 tsps of cinnamon, 1 tsp nutmeg, ½ tsp ginger, ½ tsp of cloves, and 4 tablespoons of pumpkin puree.  Cook for 5 minutes, stirring frequently, without letting it boil.  Remove from heat and allow to cool for 10-15 minutes.

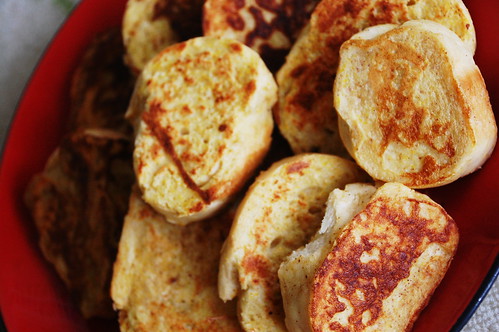
While it cools, start your french toast.  Beat eggs and milk as you normally do to make french toast, then add pumpkin puree, cinnamon and nutmeg into the mixture.  The amount will vary depending on how much you're making - I always eye ball everything and make it according to my own taste.  For my family I did: 2 eggs, a splash of milk, 1/2 cup of pumpkin, 2 tsps cinnamon and 1/2 tsp nutmeg.  Using slices of your homemade french bread, dip both sides of bread in mixture and cook over medium heat on a butter-greased griddle.  Cook on each side for several minutes, until both sides are golden brown.

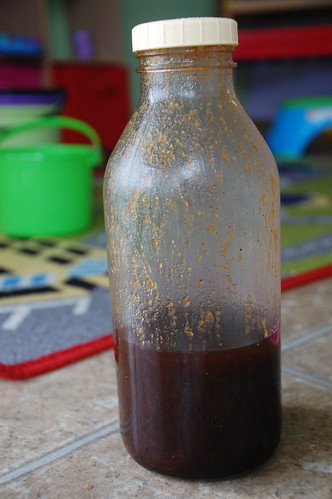
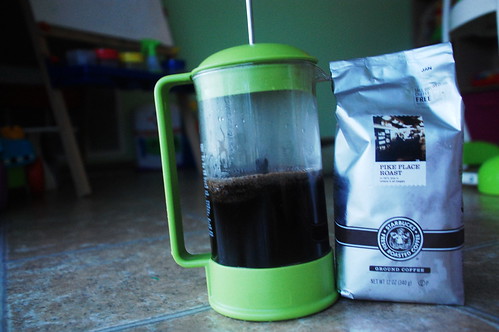
Once your syrup is cool, strain it through a fine mesh strainer into a glass bottle or container of your choice.  To make a latte, combine 2 ounces of hot coffee, 5 ounces of steamed raw milk, and 2 tablespoons of syrup.  Amounts can be adjusted according to your taste.  Leftover mixture can be stored in the fridge.


This is how much I had left after making three lattes (no, I didn't drink 3!  I shared!)

Now drizzle 100% pure maple syrup over your pumpkin french toast and enjoy with your hot, fresh pumpkin latte!  So yummy!

Monday, September 26, 2011

Day 29 - Meal Plans & Coconuts

I painted a giant rectangle of chalkboard paint in my kitchen last night for this purpose:


Meal planning!

This is mostly to organize what I'm going to feed my son and to help with shopping lists so I know, specifically, what I need from the market.  It also helps me better organize what needs to be soaked and when to soak it (I'm getting pretty good at this soaking grains stuff).  I've never been very good at following meal plans exactly to a T, I'm known to switch meals/days, so I'm not too formal about it.  As long as I know what I can make, I'm good.

Saturday night, I had set out flour to soak for pancakes on Sunday morning.  I made a big batch, so Monday's breakfast was reheated pancakes that I had froze the day before. Sunday night, I set out the flour for the tortillas to soak overnight.  This afternoon I kneaded the dough, seperated into 16 balls (I doubled the batch on purpose), rolled them all out, and cooked two at a time on the griddle.  I made a pan of beef enchiladas and froze the rest of the tortillas (to be used for tacos and burritos later in the week).

Mari came back from the store with a coconut, and I had one that I had bought from another day, so I decided to finally figure out what to do with it. 

First, I pierced the eyes by hammering a screw driver into them, and drained the coconut water into a jar.


Then we put the coconuts in zip locks bags and Mari slammed them down on the patio to break them open.  This resulted in several small pieces.  Next time, I hope to try the hammer method to hopefully get a cleaner break into two pieces.


We were munching on it raw, until I googled various things to do with coconuts and I discovered how easy it is to make coconut milk!  I followed these instructions and it turned out perfectly sweet, creamy and delicious.  And so nutritious!  I think I will make this often and slip it into the kid's food frequently for the helth benefits.

"Coconut is rich in trace minerals including manganese which is essential in metabolism, healing and collagen formation, copper which plays a role in immunity and bone health as well as selenium, a nutrient which is critical to thyroid function as well as developing healthy skin, nails and hair. Beyond these trace minerals, coconut is a potent source of lauric acid – a wholesome and nourishing saturated fat with strong antimicrobial properties which may help to bolster immunity."


~ * ~


I'm happy to report that my son is getting less picky and more open to trying new food!  He has been regularly eating bananas, which is new for him.  And when I offer a new food, he at least tastes it before he decides if he likes it or not. This past week he's been eating lots of apples and watermelon and even ate a few bowls of grapes.  The other day he ate two full bowls of jasmine brown rice and didn't even seem to notice or care that it wasn't white rice.  At dinner tonight, he ate all of his enchilada (didn't even complain about the whole wheat tortilla) and ate a whole side of corn with it!


Friday, September 23, 2011

Day 26 - Pumpkin Banana Muffins

Needed to use some bananas before they went bad so I came up with these.

They are especially good warm and smothered with butter.


2 cups whole wheat flour
1 tsp baking soda
¼ tsp salt
¼ cup butter
¼ cup coconut oil
½ cup palm sugar or sucanat
2 eggs, beaten
2 ripe bananas, mashed
1 cup pumpkin puree

Preheat oven to 350 and lightly grease muffin tin.

Combine flour, baking soda and salt.

Separately combine butter, oil, and palm sugar. Stir in eggs, bananas and pumpkin.

Combine mixture with flour mixture and stir just to moisten.

Pour batter into muffin tins. Bake for 20 minutes at 350.

Wednesday, September 21, 2011

Day 25 - Salsa and Pizza and Brownies

I've been devouring my lacto-fermented salsa the last few days.  It is so good!  I went to Costco a few days ago and got a big box of ripe mangos that I need to eat before they go bad,  so everyday I cut up a mango and add it to a bowl of salsa.


What is "lacto-fermenting" and why is it good for you?  Lacto-fermentation is when the starches and sugars in vegetables and fruit convert to lactic acid by a friendly lactic-acid producing bacteria.  When you lacto-ferment vegetables, it increases the vitamins, is more digestible, and you get a plethora of good bacteria. 

“The proliferation of lactobacilli in fermented vegetables enhances their digestibility and increases vitamin levels. These beneficial organisms produce numerous helpful enzymes as well as antibiotic and anticarcinogenic substances. Their main by-product, lactic acid, not only keeps vegetables and fruits in a state of perfect preservation but also promotes the growth of healthy flora throughout the intestine.” - Sally Fallon, Nourishing Traditions, pg 89

This is very new terroritory for me and I still know very little about it, but I do know this salsa tastes amazing.  I hope to venture more into lacto-fermenting in the future.

~ * ~

Last night I finally made some food my whole family was able to enjoy.  First, I made "granola bars" - I melted honey and peanut butter together over a low heat, then added rolled oats, poured in a pan, sprinkled with shredded coconut, and let chill in the fridge for a few hours.  They tasted like pure peanut buttery goodness.  My husband and son loved them - the whole pan is already gone!


For dinner I made whole-wheat pizza with organic tomato sauce and organic raw mozzarella cheese.  I've had the privledge of growing up eating the world's best pizza: my mom's home made recipe!  So of course I was comparing mine to hers.  And you know what?  They actually tasted pretty similiar, except that my crust was "wheatier" and I had less cheese on mine (organic raw cheese is expensive, so I was stretching it as far as I could!)


The one on the left is black olives and the one on the right is spicy venison sausage.  A friend of mine gave us some meat from a deer her husband killed -- thanks, Steph! -- and it was PERFECT on this pizza.  My husband's favorite food is pizza, so when I saw him gobble it down and he gave me endless compliments, I knew I had done something right.


For dessert, we had whole wheat brownies sweetened with coconut palm sugar.  They were dark, rich and enjoyed with a glass of raw milk.  They didn't last long either, so no photos. :)

~ * ~

I had some grass-fed beef and soaked pinto beans that I needed to use STAT, so I threw them in the crock pot with some things I had on hand: celery, carrots, and tomato sauce.  I let them simmer all day and the end result looks and smells exactly like spaghetti sauce.  I haven't tasted it yet, but I have some whole wheat spaghetti noodles in the pantry.... looks like I know what to make for dinner tomorrow. :)


Friday, September 16, 2011

Day 20 - Pumpkin Spice Latte

Although it really doesn't feel like Fall here in southern Texas, it is the middle of September and I am ready for pumpkins and soups despite the lingering high temps.

It rained briefly this morning (for the first time in many months!), which put me in the mood for coffee, and I decided to try making this pumpkin spice latte I read about.

First, I brewed some coffee in my french press:


Next I readied my ingredients: pumpkin, vanilla, cinnamon, nutmeg, ginger and cloves.  I couldn't use a fresh pumpkin because I haven't seen the baking pumpkins out at the stores yet, just the carving ones.


These were all blended with 1 cup of raw milk, 2 tablespoons of raw honey, and 1 tablespoon of pure maple syrup, then added to the coffee.


Delicious!  And no high fructose corn syrup like the artificial flavoring syrups at the coffee house. :)

Wednesday, September 14, 2011

Day 18 - Fish Taco's

My yogurt yesterday was kind of a fail, but I got a lot of whey out of it by pure accident.  So then I had to come up with some ideas to use the whey - I couldn't let it go to waste!  I love, love, love lemonade, so I started lacto-fermenting some hindu lemonade, and sinceI have an excess of tomatoes that need to be used, I also made some home made salsa and am lacto-fermenting that as well.  I'm pretty excited about both... I saved a little salsa & added a mango to eat tonight and it was so incredible and flavorful.  I can only imagine how good it will be in a more few days!

For lunch today, I started with tilapia.


I coated them on both sides with a mixture of cumin, red pepper and salt.


I baked for 12 minutes at 400 degrees, then broke them into pieces and squeezed lime juice over them.


Chopped up green onion, tomato, and lettuce:


Put them on my whole wheat tortillas from yesterday, wrapped 'em up, and had really excellent fish taco's.

Tuesday, September 13, 2011

Day 17 - Chicken Nuggets & Whole Wheat Tortillas

I was trying to decide what to do with my chicken all day yesterday, and I finally decided to use some of it for chicken nuggets.  My son was asking for dinner and I had a vegetable soup in the crock pot that I knew he wouldn't touch, so I had to make something he would eat.  I was up for the challenge.

I cut the chicken into nugget-ish sized pieces and ran them under water, then rolled them in brown rice bread crumb, and finally I fried them lightly in coconut oil.


Umm, not to toot my own horn or anything, but these were kind of amazing.  I was surprised considering the simplicity of them, but the coconut oil added a seriously sweet taste.  In case you've ever wondered, here is the ingredient list for McDonald's Chicken Nuggets:

McDonald’s Chicken Nuggets:
Chicken, water, salt, modified corn starch, sodium phosphates, chicken broth powder (chicken broth, salt, and natural flavoring (chicken source)), seasoning (vegetable oil, extracts of rosemary, mono, di- and triglycerides, lecithin). Battered and breaded with water, enriched bleached wheat flour (niacin, iron, thiamine mononitrate, riboflavin, folic acid), yellow corn flour, bleached wheat flour, modified corn starch, salt, leavening (baking soda, sodium acid pyrophosphate, sodium aluminum phosphate, monocalcium phosphate, calcium lactate), spices, wheat starch, dried whey, corn starch. Batter set in vegetable shortening. Cooked in partially hydrogenated vegetable oils, (may contain partially hydrogenated soybean oil and/or partially hydrogenated corn oil and/or partially hydrogenated canola oil and/or cottonseed oil and/or sunflower oil and/or corn oil). TBHQ and citric acid added to help preserve freshness. Dimethylpolysiloxane added as an anti-foaming agent. Source: Fast Food Facts: McDonald’s Ingredients List"
And the ingredients in my chicken nuggets?
Organic free-range chicken, medium grain brown rice,  and organic expeller pressed unrefined virgin coconut oil.  The end.  No novel neccessary.

When I first presented them to my son, I was really non-chalant about it.  "Oh, here you go, here's some chicken nuggets."  And he was totally not impressed.  I could read his mind: THESE ARE NOT SHAPED LIKE DINOSAURS.  He actually started crying.  "Are these HOME MADE?  I don't want home made chicken nuggets, I want chicken nuggets out of a bag from the freezer!"  Waaah.  Oh my gosh, my mom made wholesome, nutritious chicken nuggets, the world is ENDING!

I just walked away.  I didn't want to deal with it.  And about 15 minutes later, he came running into my bedroom, "Mom! Mom! Those chicken nuggets were SO yummy, I want more!"

Of course I made him more!  Ah-hah!  Success!  My child ate dinner!

And my daughter, for lunch yesterday, ate two bowls of THIS (steamed & pureed with Sunday's chicken broth):


Nutritionally speaking, it was a day full of win.

This morning, I made some whole wheat waffles.  My son was pretty excited about this for some reason.  He was laughing, "It's neat you can make those like that instead of the one's in the freezer." - ugh, have I really been relying on boxed foods so much, my kid is completely out of touch with cooking from scratch?  He gobbled down 2 waffles and said he liked them.

Last night before I went to bed, I had set some pinto beans in a bowl to soak overnight.  I cooked them late this morning and whipped up some whole wheat tortillas to make bean burritos for lunch.


The tortillas really are a breeze.  I follow this recipe, but I used coconut oil in the dough and coated the pan lightly with sesame oil.


Although my son isn't a fan of these & my husband is still adjusting to the taste of whole wheat rather than white, I personally find these extremely delicious.  I even like to snack on them plain.


While I was cooking the tortillas, I was simutaniously making another attempt at yogurt.  I had half a gallon of 2-week old raw milk in the fridge and I needed something to do with it.  Raw milk doesn't go bad the way pasteurized milk from the store goes bad.  Real milk just sours.  It's called clabbering and it means the good bacteria in the milk ate the lactose (milk sugar).  It's still perfectly fine and healthy to consume.  The pasteurized milk that you get at the grocery store goes bad and has to be dumped down the drain, it's putrid and can make you sick because it's full of pathogenic bacteria (insert sad face).  But real milk fresh from a happy, healthy, pastured cow that has soured isn't bad.  There are still plenty of uses for clabbered milk.  I personally can't stomach sour milk (or buttermilk, or plain yogurt) without some flavor, so I started soaking some flour for pancakes tomorrow and used the rest for another attempt at making yogurt.  I'm not too confident, but we'll find out tomorrow if it worked this time or not!